Integrating BrDot LoRaWAN with TagoIO
This tutorial provides step-by-step instructions on how to integrate Brdot LoRaWAN devices over the Helium Network with your TagoIO account. Before proceeding, please ensure that you have purchased Data Credits from BrDot by contacting them at sales@brdot.co. Once you have acquired the necessary Data Credits, follow the instructions below to complete the integration.
Kindly consider checking Brdot's LoRaWAN coverage by exploring some illustrative city examples through the links provided below. Should you be interested in deploying your application in an area currently without coverage, please feel free to reach out at sales@brdot.co
1. TagoIO Authorization
To begin, log in to your TagoIO account and create an Authorization if this is your first device connected between BrDot and TagoIO. Follow these steps:
1. Navigate to your TagoIO account.
2. Click on "Authorizations" in the left sidebar menu.
3. Click on "Add Authorization" and enter a name of your preference for the authorization.
4. (Optional) In the additional parameters, enter the Downlink URL of BrDot's Chirpstack server if you intend to use Downlinks from TagoIO to BrDot's Chirpstack devices. The URL should be in the format: `https://chirpstack.brdot.com.br/front/`. Make sure to copy this URL for later use.
5. Click on "Save" to create the authorization.
Note:
- [1] You only need to create one authorization for all your devices.
- [2] This integration only works for Uplink. No support for downlink is available yet.
2. Setting up BrDot's Chirpstack
Next, configure BrDot's Chirpstack by creating a new HTTP integration. Follow these steps:
- Go to the BrDot's Chirpstack website.
- Select your application and navigate to "Integration" under "Application".
- Click on "Create" and select "HTTP Integration"
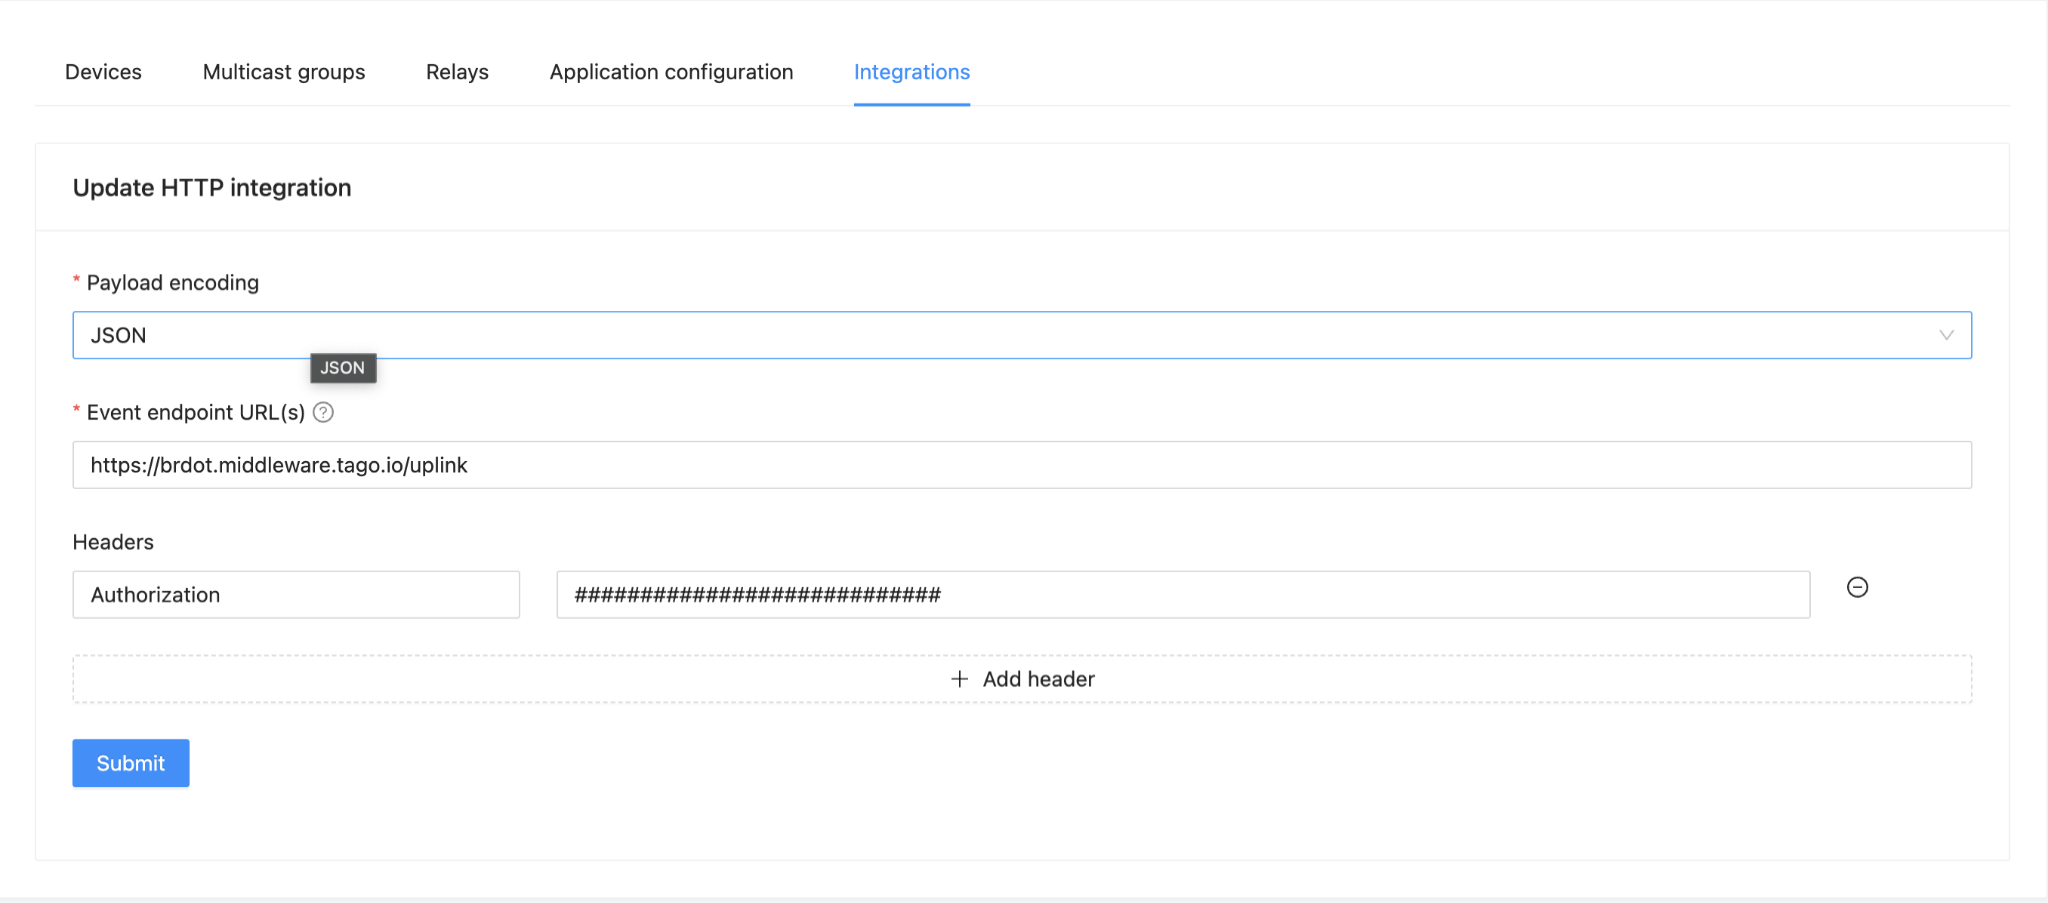
- Fill in the following fields:
- Type: HTTP integration
- Add Header key: `Content-Type` and header value: `application/json`
- Uplink endpoint: `https://brdot.middleware.tago.io/uplink`
- Add Header key: `Authorization` and the header value should be the Authorization code copied from TagoIO in the previous step.
- Click on "Save" to create the HTTP integration.
3. Adding the Device in TagoIO
Now, you can add your BrDot LoRaWAN device to your TagoIO account. Follow these steps:
1. Go to "Devices/BrDot LoraWan" in your TagoIO account.
2. Choose the appropriate device connector.
3. Enter your device's EUI (Extended Unique Identifier). You can also use the QR code to capture the EUI automatically.
Congratulations! You have successfully integrated your Brdot LoRaWAN device with TagoIO. Once you turn on your device, data will start arriving on your new dashboard in TagoIO.
Note:If you are not seeing data in your TagoIO account, please ensure that you can see data on BrDot's Chirpstack portal first. Additionally, double-check both the keys and configuration settings to ensure they are correct.
If you encounter any issues or need further assistance, please refer to the documentation or contact our support team for help.
Happy monitoring with TagoIO and Brdot LoRaWAN!
Topic Participants
Vitor Lima